Are you looking for a guide to learn how to coat a garage floor? Then you are on the right blog! Today we want to share some tips and tricks that will help you DIY garage floor coating.
If you are one of those homeowners who like to improve their houses on their own, then this is an excellent post for you.
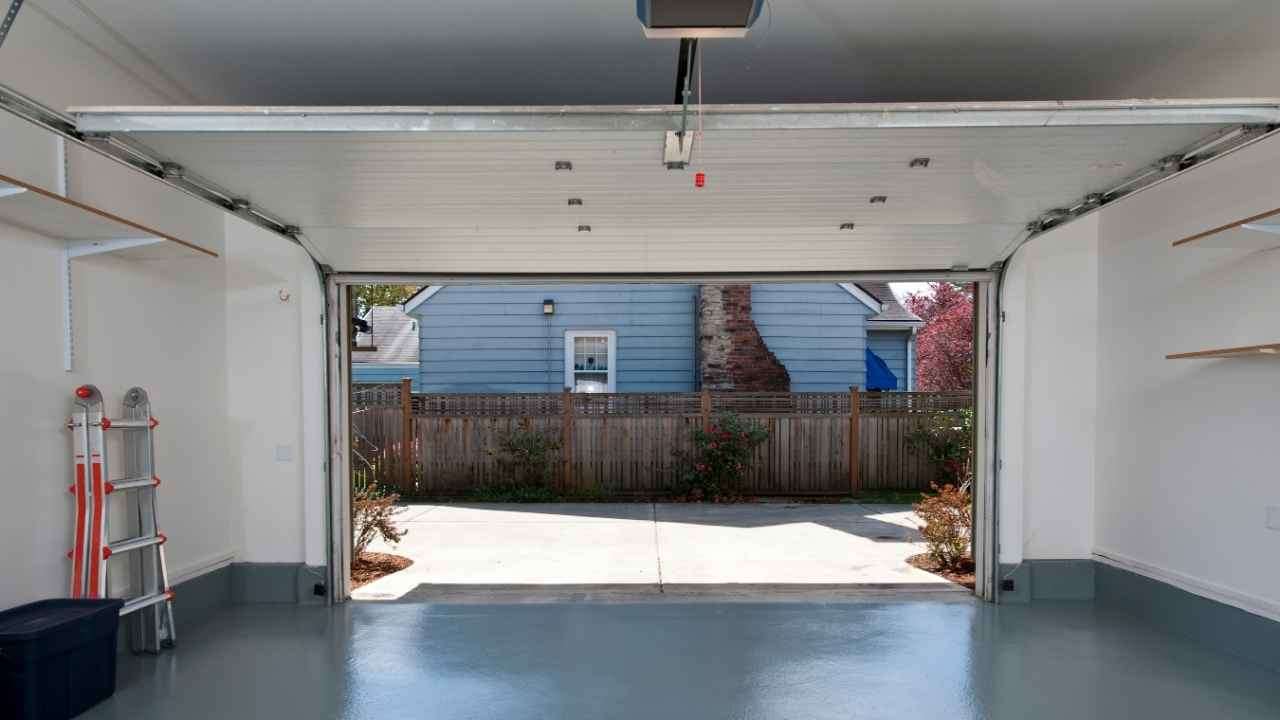
We recommend epoxy coating as it will improve your floor appearance and will also increase its value. Therefore, if you want to add protection to your garage floor, you need to pay attention to the tips that we will list in this guide.
There are many advantages of choosing an epoxy coating for garage floors, but today we will teach you how to apply it.
Before continuing with this article, it is essential to mention that epoxy coat is a better option than garage floor paint as it is a more durable and long-lasting finish. Now that you’re clear that this is the right choice for your flooring project let’s continue with this step-by-step guide.
Follow This DIY Garage Floor Coating Guide and Improve Your Floors Value
If you have already decided to carry out this project on your own, then you must be careful, or you may damage the garage floor. Next, we are going to give you valuable tips that will help you perform this task correctly. Our team is here to guide you and to make sure you make the right decisions.
DIY garage floor coating will be easy if you follow these steps:
- Inspect the garage floor to verify the concrete will accept a floor coating.
- Test your concrete floor before applying an epoxy coating.
- Clean the floor and repair the damages.
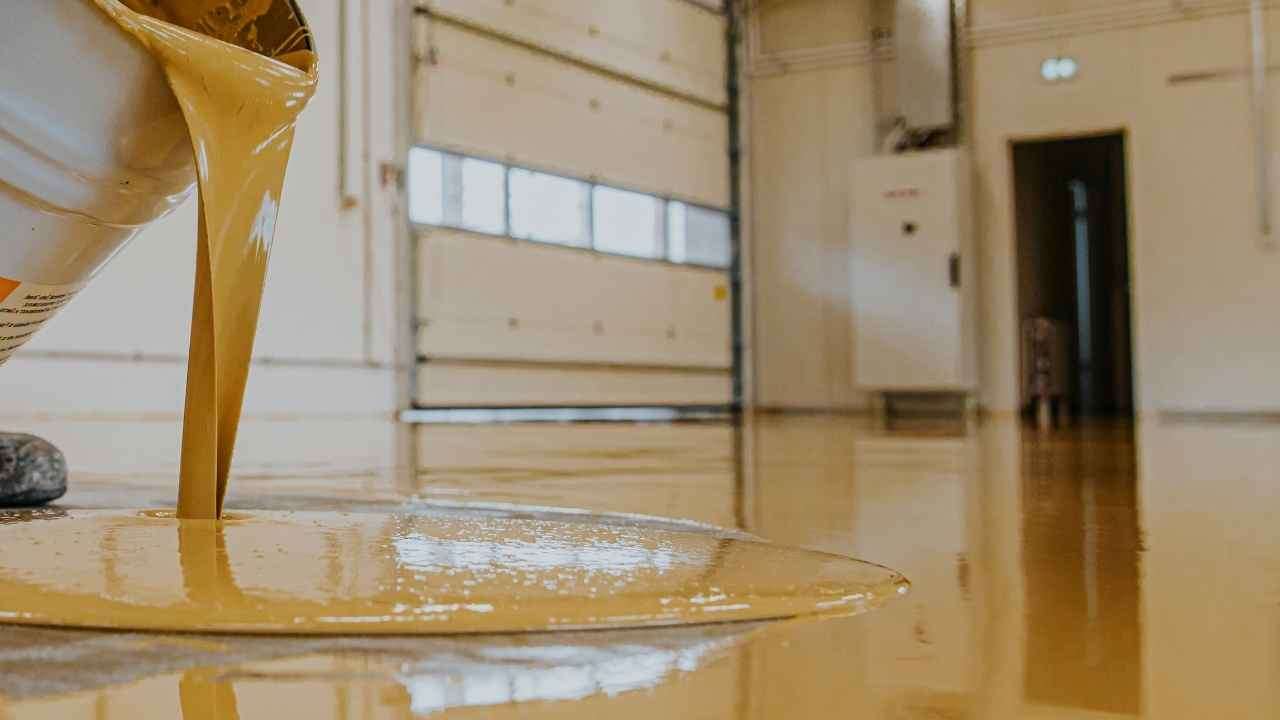
- Unpack the coating kit and apply the mix.
We know that most DIY kits bring instructions, but sometimes they are not clear. That is why we decided to create this step-by-step guide. In other words, Best Floor Coatings LLC is here to make everything easier for you.
Inspect the Garage Floor to Verify the Concrete Will Accept a Floor Coating
As a first step, you must prepare your garage floor for epoxy. Many business owners wonder why the coating they applied to their floors failed, and in most cases, it is due to poor floor preparation. That is why you must make sure your floor is compatible with the epoxy you will apply.
Test Your Concrete Floor before Applying an Epoxy Coating
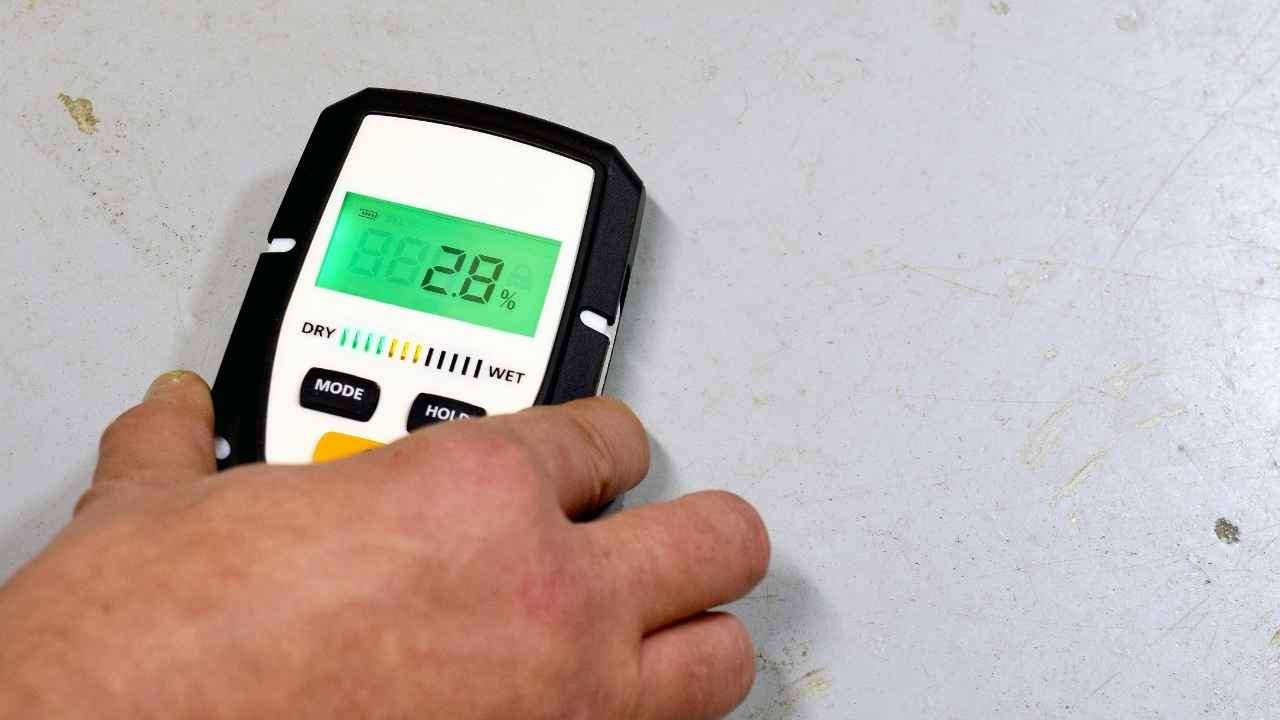
Once you inspect your garage floor, you are ready to test it and identify if there’s any sign of visible moisture. We recommend you get a moisture test kit if necessary, as you need to make sure the concrete is completely dry. If you don’t want to invest in one of those kits, look for damp concrete or efflorescence areas to identify the moisture.
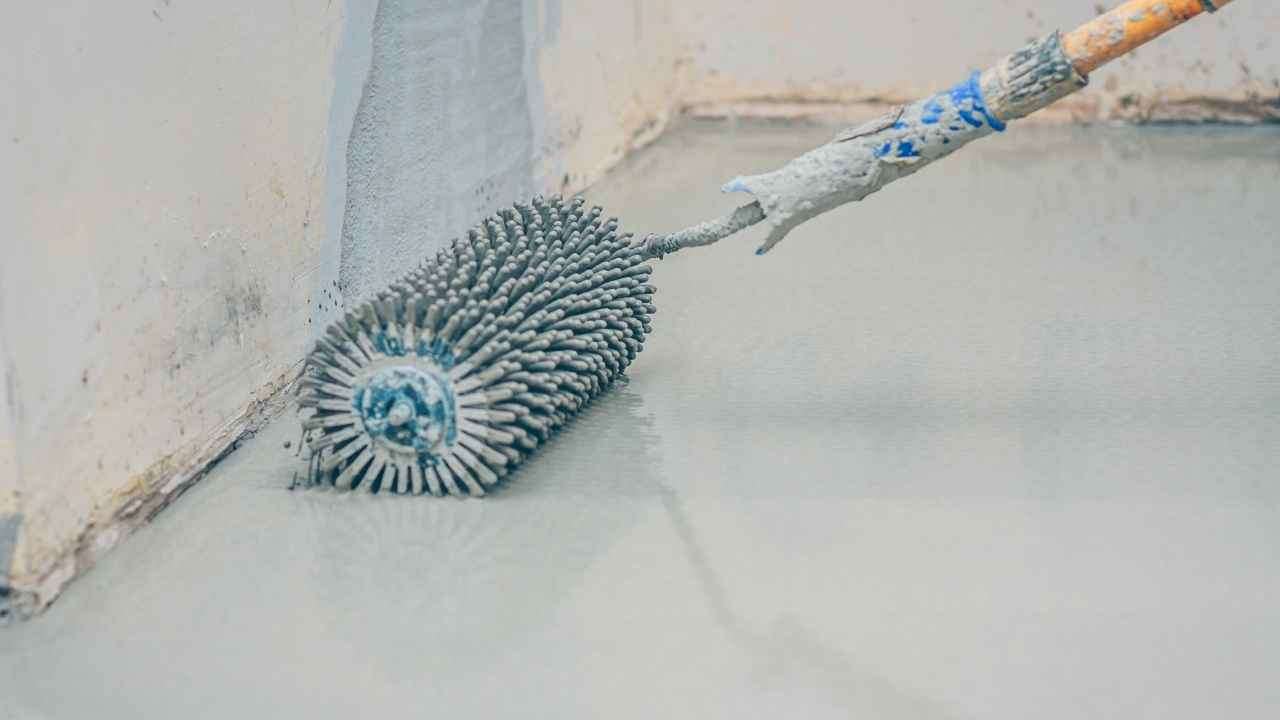
Clean the Floor and Repair the Damages
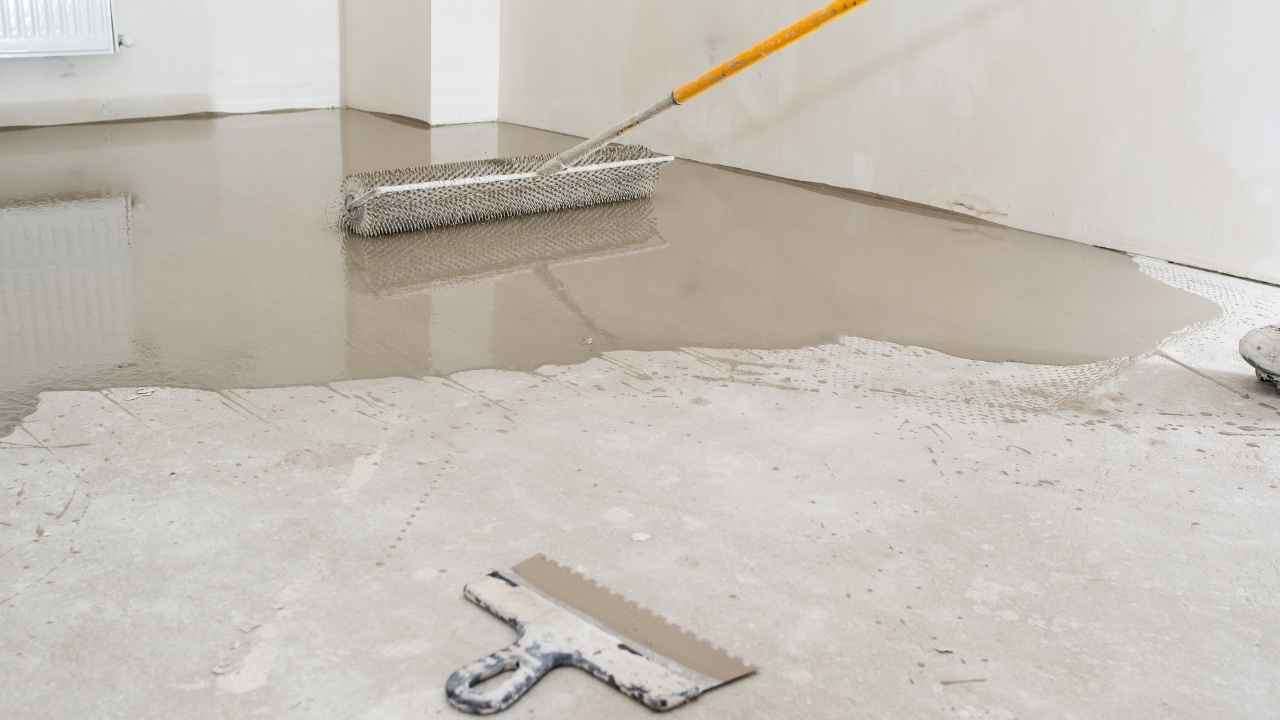
Now that you have inspected and tested the floor, it’s time to clean and repair it. You need to focus on removing oil residues and debris.
If you do not clean the surface well, then the epoxy finish will have many imperfections, and you will have to repeat the whole process.
Unpack the Coating Kit and Apply the Mix
At this point, you are ready just to apply the mixture to your garage floor. If you already bought a DIY epoxy coating kit, you should follow the label’s instructions.
Extra Tips For your DIY Garage Floor Coating project
Many people are under the impression that professional-grade epoxy garage floor coating is beyond their skill set. In fact, coating a garage floor isn’t as hard as it sounds.
While it receives the same rough treatment to the elements, the end results will often stain more easily with dirt, oil, and exhaust filth. Luckily, a DIY garage coating job can quickly return the surface’s look, restoring the garage to its former beauty in just a few hours.
Before you even consider applying epoxy, you need to make sure you follow the steps mentioned above. For instance, an epoxy coating project is not the same as a concrete floor repair job. Even so, many times these two do have the same type of problems, such as the need for leveling off large sections of concrete.
For this reason, many times the epoxy coating can be applied in a series, while the larger, more problematic sections are masked until the final coat is applied. In order to avoid problems with the smaller parts, it’s best to apply a coat or two of clear primer before beginning.
Look for sharp and pointed objects
Another important factor when applying a garage floor coating is to make sure there are no sharp or pointed objects present in the immediate area.
This can include anything from a cheap plastic drop or broom handle to rounded objects like car parts, or nails and screws, which can all potentially scratch and damage the finished surface.
Sharp edges can also catch and damage the epoxy coating and should be avoided at all costs. These edges should be treated with some caution, as they may not be easily removed, but it is possible to fill them with epoxy to remove them later on.
Mix the chemicals correctly
Another key factor to remember when mixing your materials is how to mix your particular chemicals.
While there are a few general rules to follow for most chemicals, there are just a few details that vary depending on the chemical you are working with.
For instance, the oil or gasoline base substances tend to work better with a cold or slow mixing time, while the water-based solutions are much better with faster mixing times. The other major difference between the two types of chemicals is the amount of lubrication that is needed during the mixing process.
The mixing of your coating chemicals can also be a little tricky, but it only has to be corrected by trial and error.
The mixing of the lubricants and their additives is particularly important, as some can produce undesirable color uniformity in the finished product. In general, it is best to mix the ingredients according to their recommendations in the instructions that come with your mixing containers.
If your mixture seems to have uniformity problems, try mixing a small amount before trying to achieve the proper consistency.
Start with a properly sized bucket
One of the best tips for DIY garage floor coating is to start with a properly sized bucket. This is especially important if you will be mixing or pouring your mixture, as the larger the container the less surface area you can cover with one layer.
A two or three-gallon bucket should be sufficient for your project. This saves a lot of time, energy, and money on wasted effort.
If you have any questions, then give us a call. Best Floor Coatings LLC is here to help you make the right decisions.